© 2025 Messer Cutting Systems, Inc.

Choosing the right LED stop turn tail lights affects visibility, safety, installation quality, and long-term vehicle performance. These lamps must communicate braking, turning, and rear lighting signals clearly in changing weather and traffic conditions. A bright appearance alone does not guarantee a reliable product.
During practical evaluations, I examine light output, beam coverage, response speed, housing strength, and connector quality. Good LED stop turn tail lights should produce an even red signal without dark patches or distracting glare. They should also resist water, vibration, dust, and temperature changes. Small details matter. A loose socket can create intermittent lighting, even when the LEDs themselves work well.
Compatibility deserves careful attention. Check the vehicle voltage, lamp dimensions, mounting points, wiring layout, and available functions before purchasing. Some lights use simple plug-and-play connectors, while others require additional wiring or load management. That part is often underestimated. Product specifications should come from clear testing data, manufacturer documentation, and credible user experience. Independent certifications can also provide useful confidence, although certification marks should be verified rather than assumed.
A dependable choice balances brightness with controlled visibility. Excessive glare may reduce comfort for drivers behind you. Sealing quality is equally important, especially after car washing or heavy rain. Local vehicle requirements may differ, so confirm applicable standards before installation. This guide explores the main selection factors, common mistakes, and practical inspection methods. It also recognizes an important limitation: no single lamp suits every vehicle, road condition, or driver. Careful comparison remains necessary.
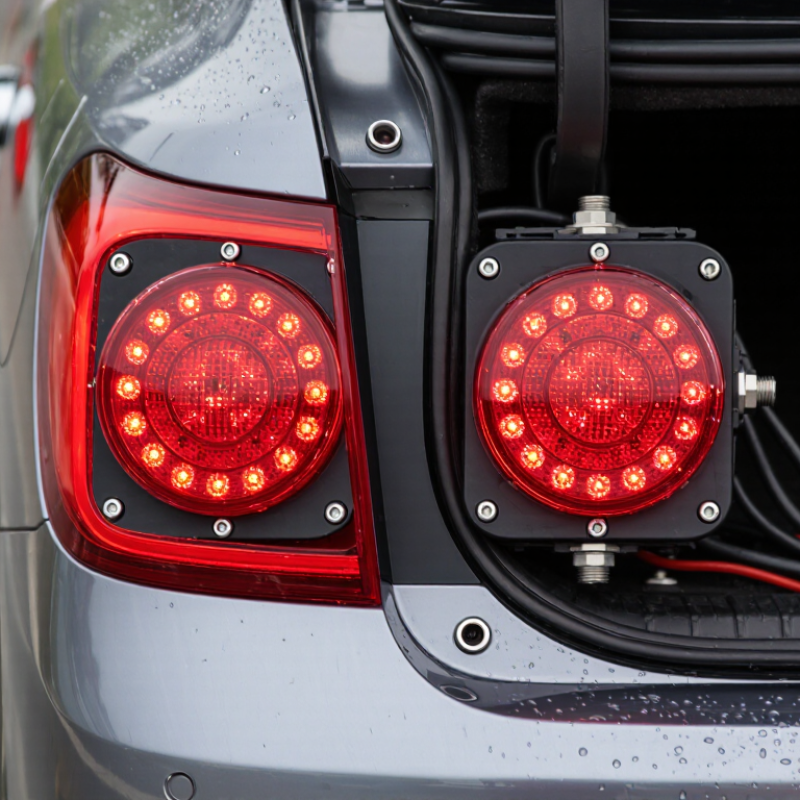
Choosing LED stop turn tail lights starts with understanding their three separate jobs. Tail lights glow steadily, helping drivers judge your vehicle’s position at night. Stop lights become brighter during braking. Turn signals flash on one side, showing your intended direction. These functions must remain visually distinct. It is a safety problem.
The U.S. Department of Energy reports that LEDs use at least 75% less energy and can last up to 25 times longer than incandescent lamps. Lower power demand can reduce wiring stress, but efficiency alone does not guarantee safety. NHTSA recorded 1,457,155 police-reported rear-end crashes in its 2022 Traffic Safety Facts report. Clear brake signaling matters in crowded traffic.
When choosing a unit, inspect brightness, lens color, beam spread, sealing, and connector fit. A red tail lamp should remain visible through rain and road spray. The brake function should create an obvious intensity change, not merely a slight glow. Turn signals need a clean flash pattern without flickering or hyper-flashing. Check SAE lighting requirements and vehicle compatibility before installation.
My own mistake was judging a lamp only in a workshop. It looked bright there. On a wet road, its side visibility was disappointing. Test the lights from several angles, including low and distant positions. Also verify grounding and warning messages after installation. A brighter lamp is not automatically safer.
Understanding the Functions of LED Stop, Turn, and Tail Lights
The chart shows whether each LED lighting function is active under common driving conditions. Tail lights provide rear visibility when the vehicle lights are on, stop lights activate when the brake pedal is pressed, and turn lights flash when a directional signal is selected. During combined braking and turning, the functions operate together.
Scale: 1 = active, 0 = normally inactive in the stated condition. Actual vehicle wiring and lighting regulations may vary by vehicle type and market.
Choosing an LED stop turn tail light begins with accurate measurements. Measure the lamp’s diameter, height, mounting-hole spacing, and body depth. Do not measure only the visible lens. The rear housing may need extra clearance behind the panel.
I have seen a replacement light match the original from the front but fail during installation. The mounting studs were too close together. Measure twice. Check the gasket shape, flange design, and lens orientation as well. A sealed housing helps prevent moisture from reaching the circuit board. That detail matters.
Vehicle compatibility also depends on electrical specifications. Confirm the system voltage before ordering. Then verify the light supports stop, tail, and turn functions. Inspect the connector, wire positions, and polarity. Some vehicles use separate circuits, while others combine functions. An electronic flasher may also react differently to LED loads. Check the vehicle manual and the light’s technical sheet together. Never rely on appearance alone.
Test the lamp before final mounting. Confirm brightness, timing, and function with the engine running if required by the vehicle design. Look for flickering, delayed activation, or warning signals. I once skipped a connector check and had to remove the lamp again. That mistake was avoidable. When measurements conflict, record them and recheck the original unit. Small differences can affect fit, sealing, and road visibility.
Brightness matters, but raw lumens can mislead. A stop lamp must attract attention without creating glare. SAE J586 provides photometric guidance for stop lamps, while SAE J578 defines red and amber color boundaries. These standards make color and intensity more meaningful than marketing numbers. During workshop checks, a clear lens can look bright in shade but weak under direct sunlight. Test the lamp at several angles, not only from behind.
Visibility depends on contrast, response time, and placement. A commonly cited NHTSA analysis found that LED brake lamps can illuminate about 0.2 seconds faster than incandescent lamps. At 60 mph, that equals roughly 17 feet of extra warning distance. It sounds impressive. Still, dirty lenses, poor grounding, and narrow viewing angles can reduce the real benefit. Check whether the lamp remains visible from the driver’s left and right positions.
Light color also deserves careful attention. Stop and tail functions should produce a clean, stable red appearance. Turn signals usually need a distinct amber or red output, depending on the vehicle and applicable requirements. Too much white leakage can weaken color recognition. Too much blue can appear harsh and confusing. Compare the lamp at dusk, in rain, and against a bright wall. My own judgment can be imperfect, so measured photometry and compliant installation should outweigh visual preference.
Choosing LED stop, turn, and tail lights starts with the vehicle, not the lamp.
Measure the mounting depth, bolt spacing, lens opening, and gasket surface. A lamp may fit the hole but still touch the body panel. Check its voltage range, connector type, polarity, grounding path, and current draw. Most light-duty vehicles use 12 volts, while some commercial systems use 24 volts. Mixing them can damage components. The U.S. Department of Energy’s Energy Saver data reports that LEDs can use up to 75% less energy and last up to 25 times longer than incandescent lighting. However, lower current may trigger fast flashing or dashboard warnings. A compatible flasher, load module, or resistor may be necessary. Do not guess.
Look for performance information linked to SAE J575 and SAE J578, plus the lighting requirements applying to your vehicle. NHTSA’s Traffic Safety Facts 2022 recorded 7,522 pedestrian deaths, with about 76% occurring in darkness. Clear rear signaling matters. Test each function separately: tail, brake, turn, hazard, and reverse feed if included. Use a multimeter before connecting the light. Confirm a steady ground under vibration, not only in the workshop. I would not trust wire colors alone. They vary between vehicles. My own weak point is rushing the final inspection. Water can enter through a pinched seal, and one loose terminal can create an intermittent fault days later. Have another person check the brake and turn patterns from several meters away.
How to Choose LED Stop Turn Tail Lights?
Durability should be tested, not guessed. In workshop use, LED lights face vibration, road spray, dust, and rapid temperature changes. Look for sealed housings, corrosion-resistant terminals, and clear installation instructions. An IP rating can indicate water and dust resistance, but it does not prove long-term road performance. Ask whether the light has passed vibration, thermal-cycle, and moisture testing. I once trusted a thick plastic lens and overlooked weak wiring. That mistake caused intermittent faults after several weeks.
Safety certification deserves careful attention. Check the lamp’s markings and documentation against the requirements of your country or vehicle category. Recognized testing should cover brightness, beam pattern, color, visibility angle, and electromagnetic compatibility. A very bright lamp is not automatically safer. Poor optical control can create glare or uneven signaling. Certification numbers should be traceable through official records, not only printed on a sales page. Documentation may feel tedious. It can prevent expensive confusion later.
Overall value includes more than the purchase price. Compare expected service life, warranty terms, connector quality, mounting strength, and replacement availability. Confirm that the turn signal does not trigger rapid flashing or dashboard warnings. Some installations need a compatible load solution, and incorrect wiring can damage the circuit. Read independent user reports, but treat every review carefully. People often praise appearance while ignoring water entry. My own evaluation would include a night visibility check, a wiring inspection, and a second look after heavy rain. That extra check is easy to skip.
| Evaluation Dimension | Recommended Weight | What to Verify | Relevant Standard or Reference | Practical Buying Benchmark | Why It Matters |
|---|---|---|---|---|---|
| Regulatory Compliance | 25% | Check whether the lamp has the correct approval marking for the vehicle’s market and intended function. Confirm that stop, turn, and tail functions are covered rather than relying only on a general “DOT” or “approved” statement. | FMVSS No. 108 in the United States; UNECE Regulations No. 6 and No. 7 in applicable markets; SAE J585, J588, and J592 may be used as performance references. | Look for clear, traceable markings and supporting test documentation. Avoid products with vague claims, missing approval numbers, or markings that cannot be matched to the product documentation. | Compliance affects legal road use, signal visibility, inspection acceptance, and liability. |
| Light Output and Visibility | 20% | Evaluate brightness, viewing angle, lens color, optical uniformity, and visibility in daylight and at night. Confirm that the turn signal remains visually distinct from the tail-light function. | Applicable photometric requirements under FMVSS No. 108 or UNECE Regulations No. 6 and No. 7. | Choose a lamp with even illumination, no dark LED spots, no excessive glare, and a clearly visible signal from the required observation angles. | Correct photometric performance helps following drivers recognize braking and turning intentions quickly. |
| Ingress Protection | 15% | Check the enclosure rating, connector sealing, cable-entry design, lens-to-housing seal, and drainage provisions. The rating should apply to the complete assembled lamp, not only to an internal component. | IEC 60529. IP6X indicates dust-tight protection; IPX7 indicates protection against temporary immersion up to 1 meter for 30 minutes under specified test conditions. | For exposed exterior mounting, IP67 or a documented equivalent is a strong benchmark. Verify that the connector and wiring have comparable protection. | Water and dust intrusion are common causes of corrosion, flickering, and premature failure. |
| Vibration and Shock Resistance | 10% | Review test evidence for vibration, mechanical shock, fastener retention, solder-joint durability, and lens cracking. Inspect the mounting system for excessive flex. | ISO 16750-3 provides environmental testing guidance for mechanical loads in road vehicles. | Prefer products with documented vehicle-environment vibration testing and reinforced mounting points. Avoid thin brackets or unsupported circuit boards. | Road vibration can loosen hardware, damage electrical connections, and create intermittent faults. |
| Thermal Management | 8% | Check for an aluminum heat sink or other effective heat path, adequate rear clearance, thermal derating information, and stable operation after prolonged use. | No single universal automotive lamp standard specifies one heat-sink design; thermal performance should be supported by manufacturer test data. | Prefer a housing that transfers heat away from the LED board and does not require blocking ventilation or placing the lamp against heat-sensitive materials. | Excess heat accelerates LED degradation, damages electronics, and may reduce light output over time. |
| Electrical Compatibility | 8% | Confirm nominal vehicle voltage, operating-voltage range, current draw, polarity, connector type, grounding method, and compatibility with bulb-out monitoring or electronic flashers. | Vehicle-specific electrical requirements; SAE J575 can provide general test guidance for lighting devices. | Use a lamp designed for the vehicle’s voltage system with protected circuitry. If replacing incandescent bulbs, confirm whether a load resistor, compatible flasher, or decoder is required. | Electrical mismatch can cause hyper-flashing, warning messages, flicker, overheating, or complete failure. |
| Color and Function Separation | 5% | Confirm the required red or amber light color, correct function assignment, lens color, and separation between stop, turn, and tail signals where applicable. | Applicable requirements under FMVSS No. 108, UNECE Regulations No. 6 and No. 7, and the vehicle’s original lighting configuration. | Choose a lamp whose emitted color and function layout match the vehicle’s legal configuration; do not assume a clear lens is acceptable for every application. | Incorrect color or function placement can reduce recognition and may make the vehicle non-compliant. |
| Installation Quality | 4% | Assess plug-and-play fit, mounting-hole accuracy, gasket quality, wire protection, strain relief, polarity labeling, and access to service points. | Vehicle installation instructions and the original equipment mounting requirements. | Prefer sealed connectors, protected wires, corrosion-resistant fasteners, and a gasket that remains compressed without distorting the housing. | A well-fitted lamp reduces water leaks, wiring damage, installation time, and future maintenance. |
| Warranty and Documentation | 3% | Review warranty duration, exclusions, return procedure, installation instructions, photometric reports, compliance documents, and replacement-part availability. | The warranty is a commercial term; technical documents should identify the tested model and applicable test conditions. | Prefer a clearly written warranty of at least two years, model-specific documentation, and a traceable support process. | Good documentation reduces purchasing risk and makes defects easier to resolve. |
| Total Cost of Ownership | 2% | Compare purchase price, installation parts, possible load resistors or adapters, energy consumption, expected maintenance, and replacement availability. | Use the actual vehicle application and installation requirements rather than price alone. | Calculate total installed cost and compare it with expected service life and warranty coverage. The lowest purchase price is not always the lowest long-term cost. | A slightly higher-quality lamp may provide better reliability, easier installation, and lower replacement costs. |
© 2025 Messer Cutting Systems, Inc.